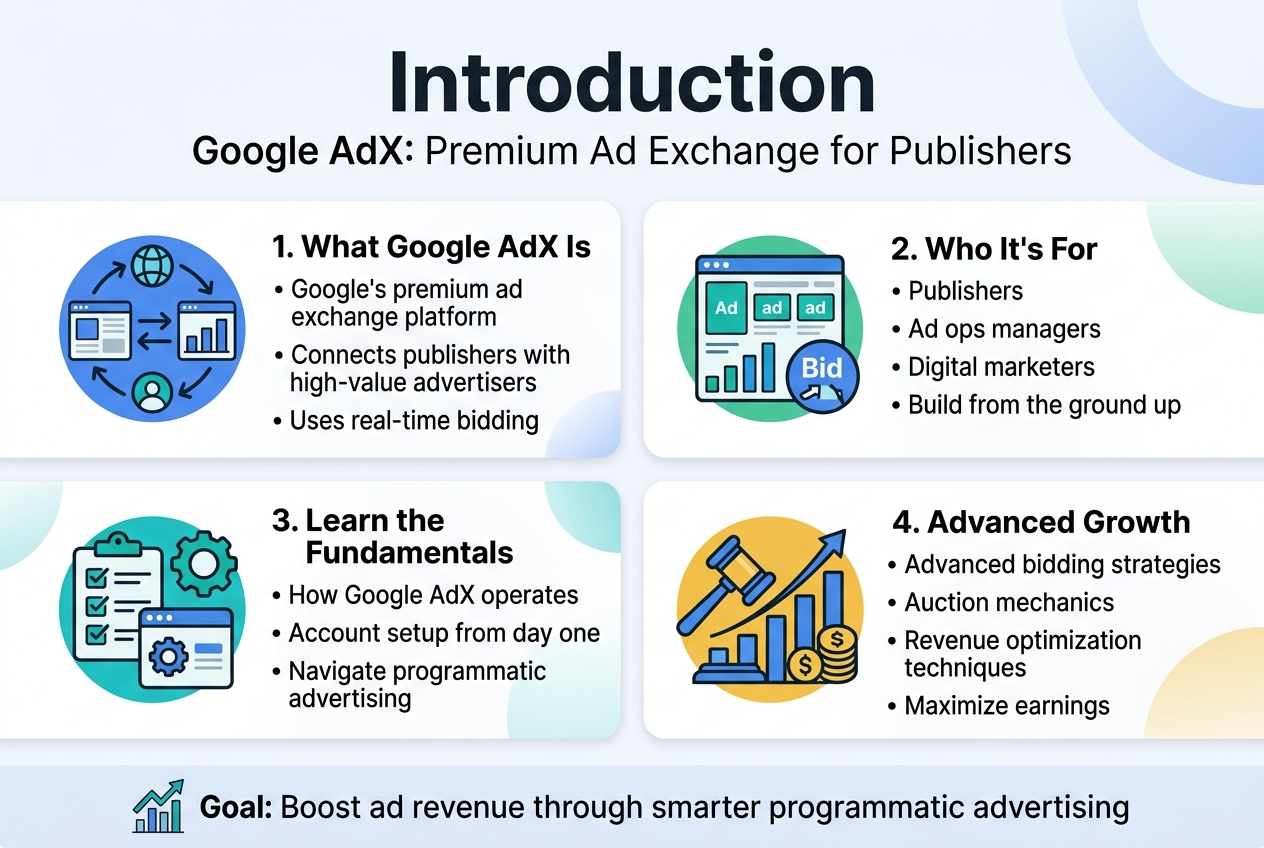
Google AdX is Google’s premium ad exchange platform that connects publishers with high-value advertisers through real-time bidding. This comprehensive guide is designed for publishers, ad ops managers, and digital marketers who want to master Google AdX from the ground up.
Whether you’re just starting out or looking to optimize your existing setup, you’ll learn how to navigate the complex world of programmatic advertising. We’ll walk you through the essential fundamentals of how Google AdX operates and show you how to set up your account properly from day one.
You’ll also discover advanced bidding strategies and auction mechanics that can significantly boost your ad revenue. Plus, we’ll cover practical revenue optimization techniques that top publishers use to maximize their earnings through the platform.
Understanding Google AdX Fundamentals

What Google AdX Is and Why Publishers Need It
Google AdX (Ad Exchange) is a programmatic advertising marketplace that connects publishers with advertisers through real-time bidding. Think of it as a sophisticated auction house where ad space gets sold to the highest bidder in milliseconds. Unlike traditional ad networks, AdX operates on a demand-side platform model where multiple buyers compete for your inventory simultaneously.
Publishers turn to AdX because it offers premium demand from top-tier advertisers who are willing to pay higher rates for quality inventory. The platform provides access to Google’s vast advertiser network, including YouTube advertisers and Google Ads buyers, creating more competition for your ad space. This increased competition typically translates to better fill rates and higher eCPMs.
AdX also gives publishers granular control over their inventory through features like price floors, blocking controls, and audience segmentation. You can set minimum prices for different ad placements, block specific advertisers or categories, and create custom audience segments to maximize revenue from different visitor types.
Key Differences Between AdX and Google AdSense
| Feature | Google AdSense | Google AdX |
|---|---|---|
| Access | Open to most publishers | Invitation-only or through certified partners |
| Revenue Share | Google keeps 32% | Negotiable, typically 10-20% |
| Control | Limited customization | Full control over pricing and buyers |
| Minimum Traffic | No minimum | 5-10 million monthly pageviews |
| Ad Formats | Standard display, text | All formats including video, native |
| Bidding | Google’s algorithm | Real-time bidding marketplace |
AdSense works like having a single landlord manage your property, while AdX is like running your own auction house. With AdSense, Google handles everything automatically but takes a larger cut and offers less control. AdX requires more hands-on management but provides significantly higher revenue potential.
The buyer pool differs dramatically between platforms. AdSense primarily serves small to medium advertisers through the Google Ads platform, while AdX attracts enterprise-level buyers, agencies, and trading desks with larger budgets and more sophisticated targeting requirements.
Eligibility Requirements and Account Prerequisites
Getting approved for Google AdX requires meeting strict eligibility criteria that filter out smaller publishers. You need a minimum of 5 million monthly pageviews, though some sources suggest 10 million for direct access. Your website must comply with Google’s publisher policies, including content quality standards, user experience requirements, and technical specifications.
Traffic quality matters more than quantity. Google evaluates your audience engagement metrics, bounce rates, session duration, and traffic sources. Sites with high bot traffic, incentivized visits, or poor user experience get rejected regardless of volume.
Technical requirements include having Google Analytics and Google Ad Manager accounts properly configured. Your site needs to be mobile-optimized, load quickly, and provide a clean user experience without intrusive ads or misleading content.
Most publishers access AdX through Google Certified Publishing Partners (MCMs) rather than direct approval. These partners have established relationships with Google and can provide access to AdX along with additional optimization services. Popular MCM partners include Mediavine, AdThrive, and Ezoic, each with their own additional requirements and revenue sharing models.
Financial prerequisites include having a registered business entity and tax documentation. Google requires publishers to provide detailed business information, banking details, and comply with local tax regulations. International publishers may need additional documentation depending on their country’s specific requirements.
Setting Up Your Google AdX Account
Step-by-Step Account Application Process
Getting your hands on a Google AdX account isn’t as simple as signing up for a regular Google service. The application process requires careful preparation and attention to detail.
Start by accessing the Google AdX application portal through Google Ad Manager. You’ll need a valid Google account that’s associated with your business email address. Personal Gmail accounts won’t cut it for this process.
The application form asks for comprehensive business information including your company’s legal name, physical address, tax identification number, and detailed contact information. Google takes fraud prevention seriously, so ensure all details match your official business documentation.
Your website plays a crucial role in the approval process. Submit your primary domain along with any additional properties you plan to monetize. Google’s review team will examine your site’s content quality, user experience, and overall legitimacy.
Financial information comes next. You’ll need to provide banking details for payment processing and tax documentation. US-based publishers must submit W-9 forms, while international publishers need W-8 forms with appropriate tax treaty information.
The waiting period typically ranges from 2-8 weeks, though complex applications may take longer. Google’s team manually reviews each submission, checking for policy compliance and business legitimacy. During this time, avoid making significant changes to your website structure or content, as this could impact the review process.
Publisher Requirements and Approval Criteria
Google AdX maintains strict standards that separate it from other ad networks. Understanding these requirements before applying saves time and increases your approval chances.
Traffic Requirements
Your website needs substantial, organic traffic from real users. While Google doesn’t publish specific minimum traffic numbers, most approved publishers generate at least 5-10 million monthly page views. Quality matters more than quantity – engaged users who spend time on your site carry more weight than inflated visitor counts.
Content Standards
Your content must be original, valuable, and regularly updated. Google’s algorithms can detect duplicate or scraped content easily. News sites, entertainment portals, and educational platforms typically perform well, while niche blogs or personal websites face tougher scrutiny.
Technical Requirements
Your website must load quickly and function properly across all devices. Mobile optimization isn’t optional – it’s mandatory. Google also expects clean code, proper SSL certificates, and responsive design that adapts to different screen sizes.
Policy Compliance
AdX policies are stricter than AdSense. Your content can’t promote violence, illegal activities, or adult material. Even borderline content like political commentary or health advice requires careful handling to avoid policy violations.
Business Legitimacy
Google verifies that you’re running a legitimate business operation. This includes checking your business registration, tax status, and physical location. Shell companies or suspicious business structures typically face rejection.
Geographic Considerations
AdX availability varies by country. Publishers in certain regions may face additional verification requirements or longer approval times due to local regulations and market conditions.
Navigating the Google AdX Interface
Dashboard Overview and Key Metrics
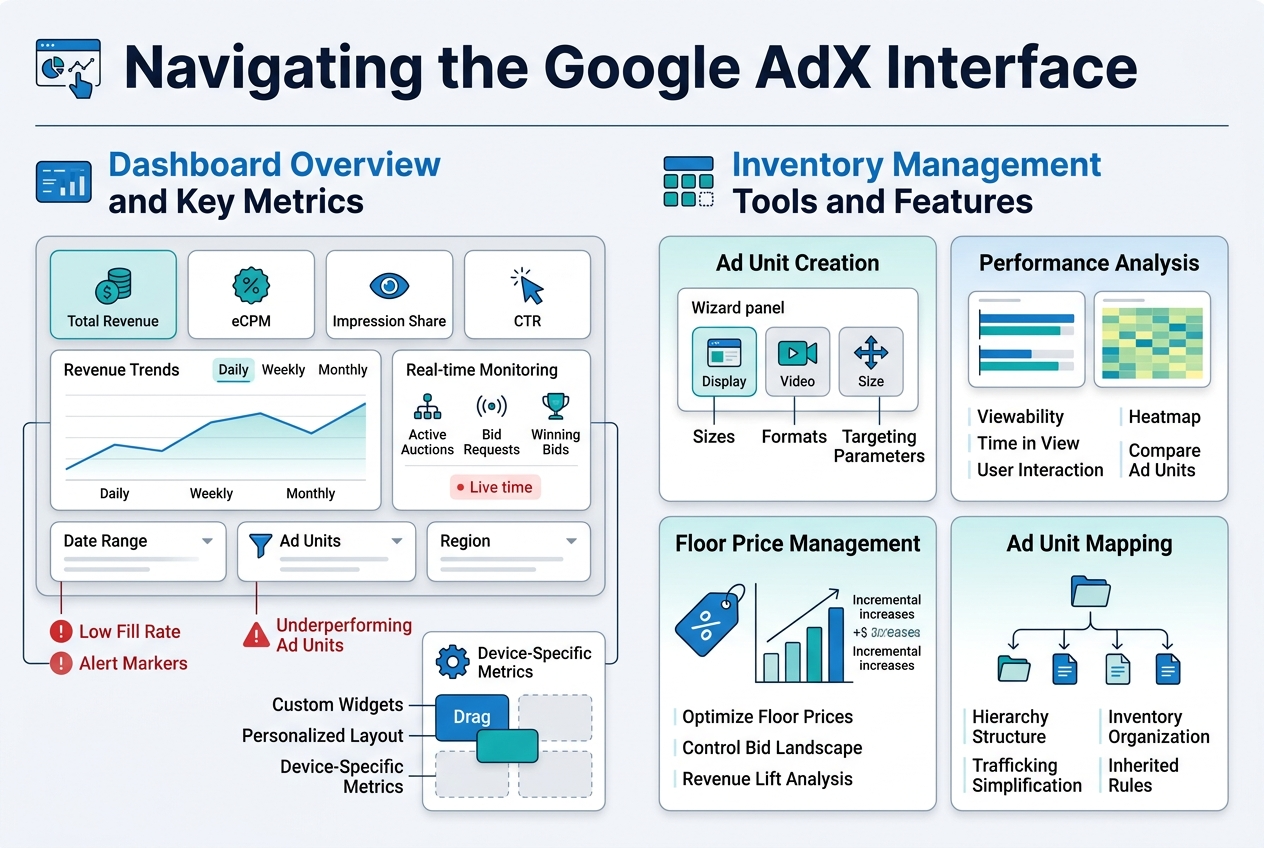
The Google AdX dashboard serves as your command center, displaying critical performance data at a glance. When you first log in, you’ll see real-time revenue figures, impression volumes, and fill rates prominently displayed across customizable widgets. The revenue chart shows daily, weekly, and monthly earnings trends, helping you spot seasonal patterns or sudden drops that need attention.
Key performance indicators (KPIs) occupy the upper section of the dashboard. These include total revenue, effective cost per mille (eCPM), impression share, and click-through rates (CTR). The eCPM metric deserves special attention since it directly impacts your bottom line – higher eCPMs typically signal better ad quality and targeting. You can filter these metrics by date ranges, ad units, or geographic regions using the dropdown menus.
The dashboard also features a real-time monitoring section showing active auctions, bid requests, and winning bids. This live data helps you understand how your inventory performs during peak traffic hours. Red flags appear when fill rates drop below expected thresholds or when certain ad units underperform compared to historical averages.
Customization options allow you to arrange widgets based on your priorities. Publishers focused on mobile traffic might prioritize device-specific metrics, while those managing multiple sites often create custom views for each property. The dashboard remembers your preferences and loads your personalized layout each time you access the platform.
Inventory Management Tools and Features
The inventory management section houses powerful tools for organizing and optimizing your ad placements. The ad unit creation wizard walks you through setting up new inventory, from basic display ads to complex video placements. You’ll define sizes, formats, and targeting parameters that determine which advertisers can bid on your space.
Ad unit performance analysis provides granular insights into each placement’s effectiveness. You can view metrics like viewability rates, time spent in view, and user interaction data. This information proves invaluable when deciding which placements to expand or retire. The comparison tool lets you evaluate similar ad units side-by-side, making optimization decisions more data-driven.
Floor price management sits within this section, allowing you to set minimum bid thresholds for different inventory types. Dynamic floor pricing automatically adjusts these minimums based on historical performance and market conditions. You can also create price floors for specific advertisers or buyer networks, giving you granular control over who can access your premium inventory.
The blocking controls help maintain ad quality and brand safety. You can block specific advertisers, creative categories, or sensitive content that doesn’t align with your site’s values. Advanced filtering options include blocking based on landing page URLs, advertiser domains, or even specific creative elements that might clash with your design aesthetic.
Inventory forecasting tools predict future ad availability and potential revenue based on your traffic patterns. These projections help with capacity planning and allow you to communicate realistic expectations to direct advertisers or programmatic partners.
Creating and Managing Ad Inventory
Defining Ad Units and Placement Strategies
Ad units represent the building blocks of your advertising inventory on Google AdX. Think of them as the containers where ads will appear on your website. Each ad unit has specific dimensions, formats, and targeting criteria that determine what types of ads can fill those spaces.
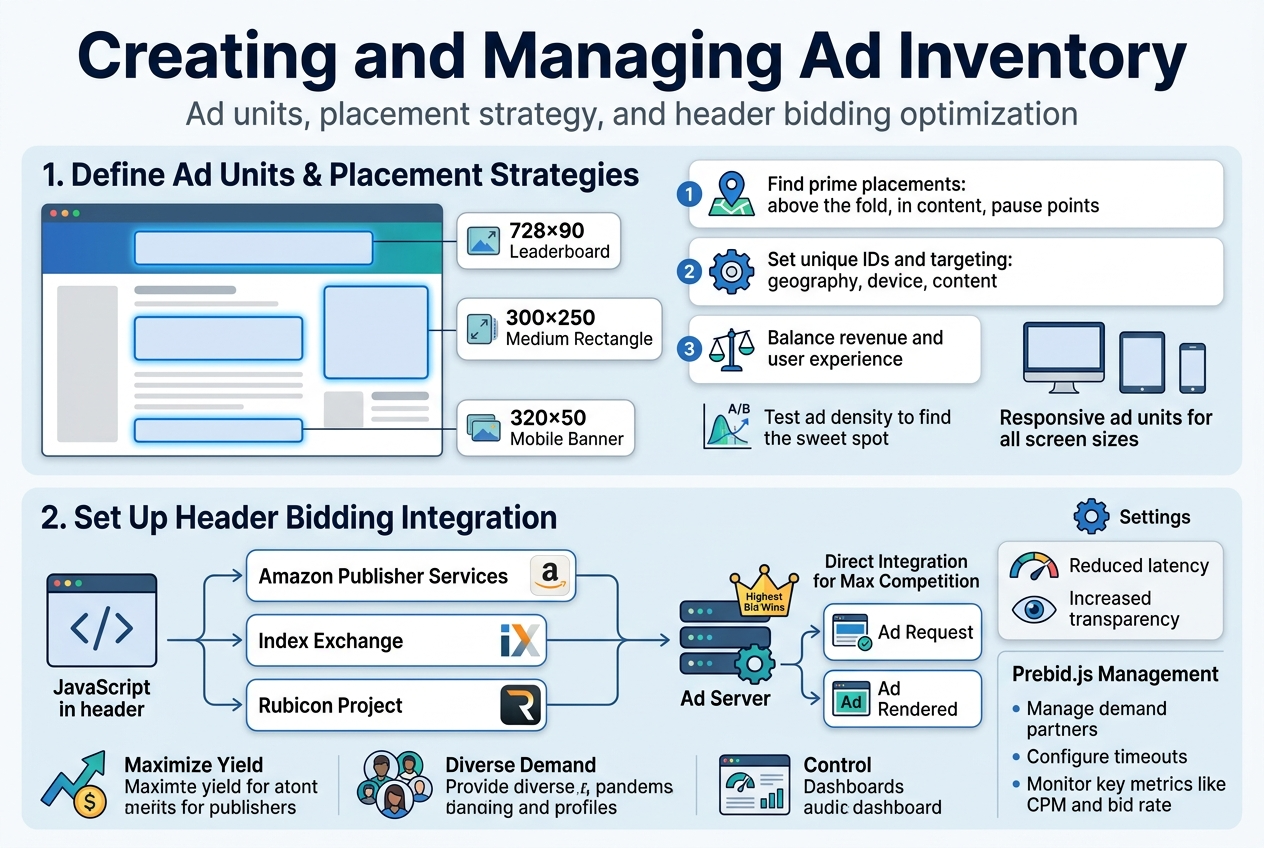
Start by analyzing your website layout to identify prime real estate for ad placements. High-performing locations typically include above-the-fold positions, within content areas, and spots where users naturally pause while reading. Popular ad unit sizes include 728×90 leaderboards for headers, 300×250 medium rectangles for sidebars, and 320×50 mobile banners for smartphone users.
When setting up ad units in AdX, you’ll assign each one a unique identifier and configure its targeting parameters. These settings determine which advertisers can bid on your inventory and what types of campaigns will compete for each placement. Consider factors like geographic targeting, device compatibility, and content categories when defining these parameters.
Your placement strategy should balance user experience with revenue potential. Avoid overwhelming visitors with too many ads, as this can hurt engagement and actually reduce earnings. Instead, focus on strategic positioning that complements your content flow. Test different configurations using A/B testing to find the sweet spot between ad density and user satisfaction.
Remember to create responsive ad units that adapt to different screen sizes. Mobile traffic often represents a significant portion of publisher revenue, so your ad units must perform well across all devices. Configure minimum and maximum sizes to ensure ads display properly regardless of the user’s device.
Setting Up Header Bidding Integration
Header bidding transforms how your ad inventory gets sold by allowing multiple demand sources to compete simultaneously before your primary ad server makes its decision. This competition typically drives up your overall revenue compared to the traditional waterfall method.
The technical implementation involves adding JavaScript code to your website’s header section. This code reaches out to various demand partners, collects their bids, and passes the highest bid to your ad server for comparison against direct-sold campaigns. The entire process happens within milliseconds, maintaining a smooth user experience.
Choose your demand partners carefully based on factors like bid density, latency, and payment reliability. Popular header bidding partners include Amazon Publisher Services, Index Exchange, and Rubicon Project. Each partner brings different advertiser demand and may perform better with specific audience segments or content verticals.
Configure timeout settings to balance revenue optimization with page load speed. Shorter timeouts mean faster page loads but potentially lower bids, while longer timeouts might capture higher bids but could slow down your site. Most publishers find success with timeout periods between 1-2 seconds.
Monitor your header bidding performance regularly through analytics dashboards. Track metrics like bid rate, win rate, and average CPM for each partner. Remove underperforming demand sources that don’t contribute meaningful revenue while adding unnecessary latency to your pages.
Consider using a header bidding wrapper like Prebid.js to simplify partner management and reduce development overhead. These solutions provide standardized integration methods and built-in analytics tools that make optimization much easier for publishers without extensive technical resources.
Advanced Bidding and Auction Mechanics
Real-Time Bidding Process Explained
Real-time bidding transforms digital advertising by conducting lightning-fast auctions for each ad impression. When a user loads a webpage with available ad space, the entire bidding process completes in approximately 100 milliseconds.
The process begins when a publisher’s ad server sends a bid request containing user information, page context, and inventory details to Google AdX. This request includes demographic data, browsing behavior, device type, and geographic location while maintaining user privacy through anonymization.
Advertisers receive this bid request through their demand-side platforms (DSPs) or directly through AdX. Their algorithms analyze the available data against campaign targeting parameters, budget constraints, and performance goals. Each advertiser then submits their maximum bid for that specific impression.
Google AdX collects all incoming bids and determines the winning advertiser based on the auction model in place. The winning ad creative gets selected and served to the user’s browser, completing the entire cycle before the webpage finishes loading.
Key RTB Components:
- Bid Request: Contains inventory and user data
- Bid Response: Advertiser’s offer and creative
- Auction Logic: Determines winning bid
- Ad Serving: Delivers chosen creative
The system processes millions of these auctions simultaneously across AdX’s global infrastructure. Machine learning algorithms optimize bid decisions in real-time, adjusting strategies based on performance data and market conditions.
First-Price vs Second-Price Auction Models
Google AdX transitioned from second-price to first-price auctions in 2019, fundamentally changing how advertisers approach bidding strategies and cost management.
In second-price auctions, winning advertisers paid just one cent above the second-highest bid, regardless of their actual bid amount. An advertiser bidding $10 would pay $5.01 if the next highest bid was $5.00. This model encouraged truthful bidding since advertisers couldn’t game the system by bidding lower.
First-price auctions require winners to pay their exact bid amount. The same $10 bidder now pays the full $10, creating pressure to bid more strategically. Advertisers must balance competitive positioning against cost efficiency.
Comparison Table:
| Aspect | Second-Price | First-Price |
|---|---|---|
| Payment | Second-highest bid + $0.01 | Exact bid amount |
| Bidding Strategy | Bid true value | Strategic bid shading |
| Cost Predictability | Higher | Lower |
| Revenue for Publishers | Variable | Generally higher |
First-price auctions typically generate higher revenue for publishers since advertisers pay their full bid amounts. However, this model requires sophisticated bid optimization algorithms to prevent overpaying.
Bid Shading Strategies:
- Historical win rate analysis
- Market price discovery
- Dynamic bid adjustments
- Competitor behavior modeling
Advertisers now employ bid shading techniques, algorithmically reducing bids while maintaining competitive win rates. DSPs have developed complex models that predict optimal bid amounts based on historical auction data, inventory characteristics, and competitive landscape analysis.
The shift impacts campaign management significantly. Advertisers must recalibrate budget allocation, adjust target CPMs, and implement more sophisticated bidding algorithms to maintain performance levels while controlling costs in the new auction environment.
Revenue Optimization Strategies
A/B Testing Different Ad Formats and Sizes
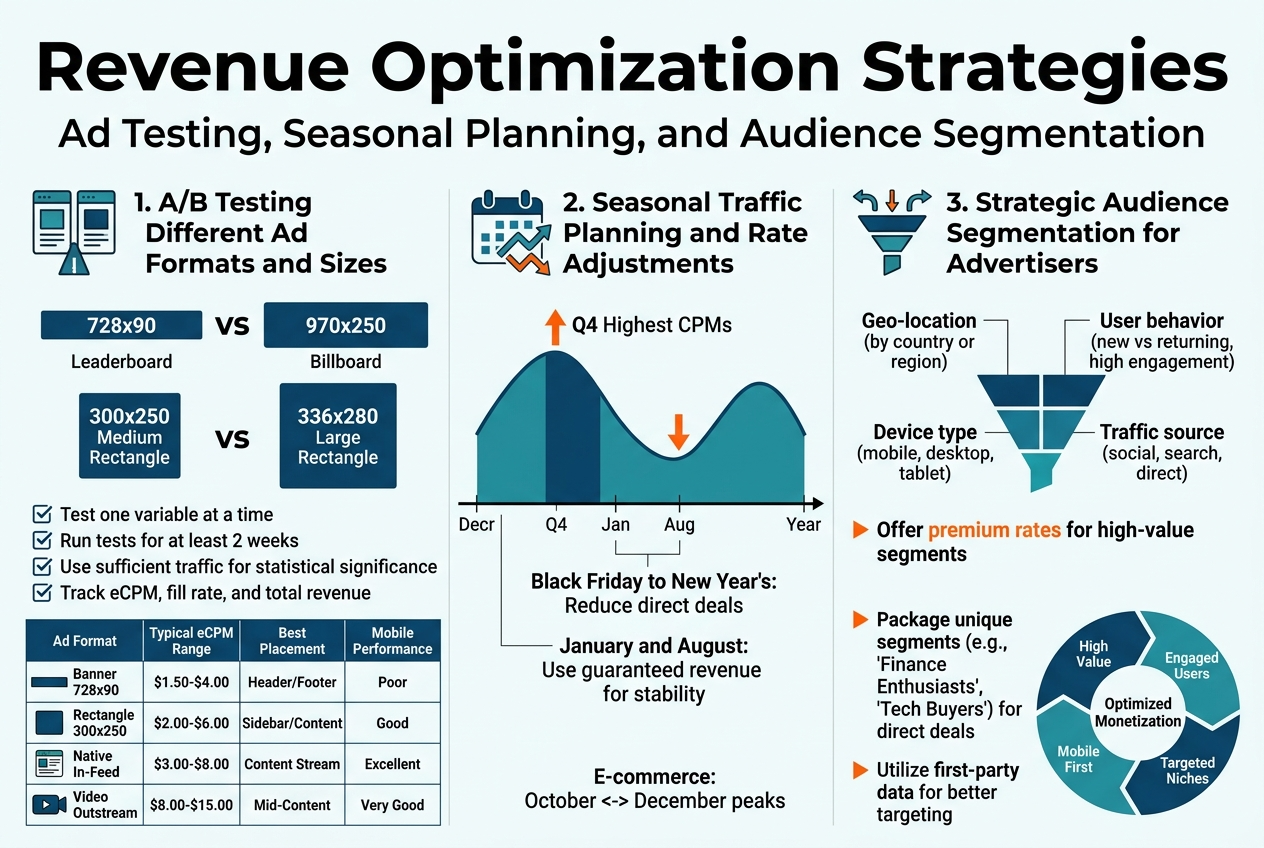
Running systematic A/B tests on your ad inventory can dramatically boost your revenue performance. Start by identifying your highest-traffic pages and implement split testing between different ad unit sizes. For example, test a 728×90 leaderboard against a 970×250 billboard in your header position, or compare 300×250 medium rectangles with 336×280 large rectangles in your sidebar.
The key is testing one variable at a time while keeping all other factors constant. Run tests for at least two weeks to account for weekly traffic patterns, and ensure you have sufficient traffic volume for statistically significant results. AdX provides built-out reporting that shows eCPM, fill rates, and total revenue for each variation.
Native ad formats often outperform traditional banner ads, especially on mobile devices. Test in-feed ads against standard banner placements to see which generates higher engagement rates. Video ad units typically command higher CPMs than display ads, but they might affect user experience differently.
| Ad Format | Typical eCPM Range | Best Placement | Mobile Performance |
|---|---|---|---|
| Banner 728×90 | $1.50-$4.00 | Header/Footer | Poor |
| Rectangle 300×250 | $2.00-$6.00 | Sidebar/Content | Good |
| Native In-Feed | $3.00-$8.00 | Content Stream | Excellent |
| Video Outstream | $8.00-$15.00 | Mid-Content | Very Good |
Seasonal Traffic Planning and Rate Adjustments
Your ad revenue fluctuates significantly throughout the year, with Q4 typically bringing the highest CPMs due to holiday shopping. Smart publishers prepare for these seasonal shifts by adjusting their inventory strategy months in advance.
During high-demand periods like Black Friday through New Year’s, consider reducing direct deals to maximize programmatic auction competition. AdX performs best when multiple demand sources compete for your inventory. Conversely, during slower periods like January and August, having guaranteed revenue from direct partnerships can provide stability.
Create seasonal content calendars that align with advertiser spending patterns. E-commerce advertisers ramp up spending in October, while travel advertisers peak during spring planning season. Financial services often increase budgets at year-end and beginning of new quarters.
Monitor your traffic patterns year-over-year to predict seasonal dips and spikes. If you typically see 40% traffic increases during certain events or holidays, prepare additional ad inventory to capture that demand. Temporary ad placements that only appear during high-traffic periods can boost revenue without permanently affecting user experience.
Audience Targeting and Segmentation Benefits
Understanding your audience demographics unlocks significant revenue opportunities through better targeting capabilities. AdX allows you to create audience segments based on user behavior, geographic location, device type, and browsing patterns.
Geographic targeting proves especially valuable for publishers with diverse traffic sources. Users from tier-1 countries (US, UK, Canada, Australia) typically generate 3-5x higher CPMs than tier-3 traffic. Use this data to optimize your content strategy and potentially geo-gate premium content to maximize revenue from high-value visitors.
Behavioral segmentation reveals which user actions correlate with higher advertiser value. Visitors who spend more than three minutes on your site, view multiple pages, or return frequently often attract premium advertising rates. Create custom audiences for these engaged users and potentially serve them more ad units or premium placements.
Device targeting has become essential as mobile traffic dominates most websites. Mobile CPMs traditionally lag behind desktop, but mobile video and native ads can bridge this gap. Tablet users often show desktop-like engagement patterns with mobile-like ad format preferences.
Time-of-day and day-of-week patterns affect both traffic volume and advertiser demand. Business-focused content might see higher CPMs during weekday business hours, while entertainment content peaks during evenings and weekends. Adjust your publishing schedule and ad density accordingly to capitalize on these patterns.
Troubleshooting Common AdX Issues
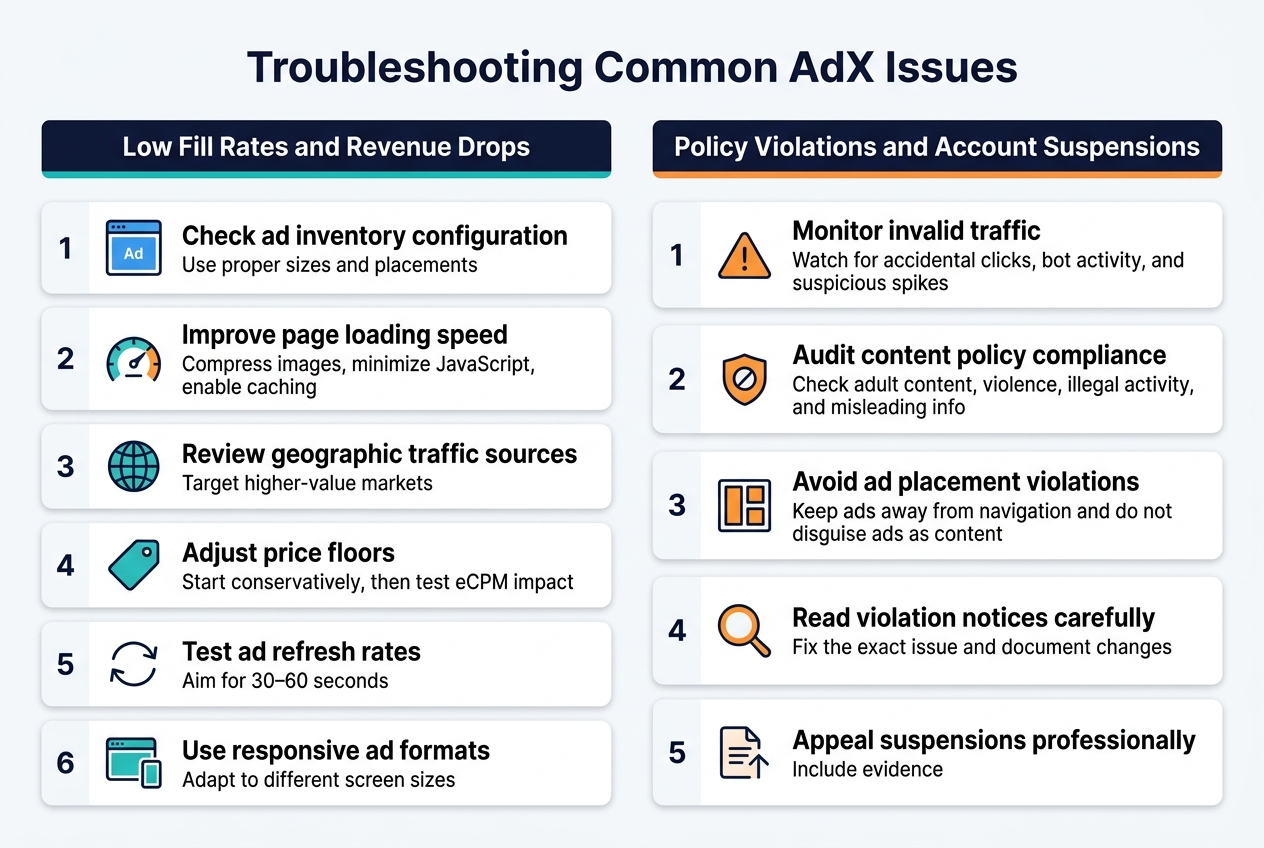
Low Fill Rates and Revenue Drops
When your AdX fill rates start dropping or revenue takes a nosedive, it feels like watching your money disappear in real-time. The first place to look is your ad inventory configuration. Check if your ad units are properly sized and positioned according to Google’s best practices. Banner blindness happens when ads are placed in spots users naturally ignore, so experiment with different placements.
Your website’s loading speed directly impacts fill rates. Publishers often overlook this, but if your pages take forever to load, advertisers won’t bid on your inventory. Use Google PageSpeed Insights to identify bottlenecks and compress images, minimize JavaScript, and enable browser caching.
Geographic targeting can also kill your fill rates. If most of your traffic comes from regions with low advertiser demand, you’ll see fewer bids. Review your traffic analytics and consider expanding content that attracts users from higher-value markets like North America and Western Europe.
Price floors deserve special attention here. Setting them too high scares away potential bidders, while too low floors hurt your revenue. Monitor your eCPM trends and adjust floors based on historical performance data. Start with conservative floors and gradually increase them while watching how fill rates respond.
Ad refresh rates can backfire if configured incorrectly. Refreshing ads too frequently can trigger policy violations, while too slow refresh rates miss revenue opportunities. The sweet spot is usually between 30-60 seconds, but test different intervals to find what works for your audience.
Check your ad formats too. Responsive ads typically perform better than fixed-size units because they adapt to different screen sizes and increase the pool of available advertisers.
Policy Violations and Account Suspensions
Getting hit with a policy violation feels like getting pulled over by a cop – your heart sinks and panic sets in. The most common violations involve invalid traffic patterns. This includes accidental clicks, incentivized traffic, or bot activity. Install Google Analytics to monitor your traffic sources and look for suspicious spikes in clicks or impressions that don’t match your normal patterns.
Content policy violations catch many publishers off guard. Google’s content policies are strict about adult content, violence, illegal activities, and misleading information. Even user-generated content like comments can trigger violations. Implement content moderation systems and regularly audit your pages for compliance.
Ad placement violations happen when publishers get creative with positioning. Ads can’t be placed too close to navigation elements, can’t be disguised as content, and shouldn’t be placed where users might accidentally click them. The “three-click rule” is your friend – users should never accidentally click an ad within three clicks of arriving on your page.
When you receive a violation notice, don’t panic and start making random changes. Read the violation email carefully and identify the specific issue. Google usually provides examples or screenshots of problematic areas. Fix the exact problem mentioned, document your changes, and submit an appeal with detailed explanations of what you corrected.
Account suspensions require a more strategic approach. Gather all relevant data about your traffic sources, content policies, and technical implementations. Write a professional appeal that acknowledges the issue, explains the corrective actions taken, and provides evidence of compliance. Include screenshots, analytics data, and implementation details.
Prevention beats cure every time. Regular policy audits should be part of your routine. Set up Google Search Console alerts, monitor your traffic quality scores, and stay updated with AdX policy changes through official Google publisher resources.
Google AdX opens up a world of programmatic advertising opportunities, but success depends on mastering both the basics and advanced features. From setting up your account and navigating the interface to creating ad inventory and understanding complex auction mechanics, each step builds toward maximizing your revenue potential. The platform’s sophisticated bidding system and optimization tools give you powerful ways to increase earnings, but they require patience and consistent monitoring to see real results.
Ready to take your AdX performance to the next level? Start by implementing the revenue optimization strategies we covered, and don’t forget to regularly check for common issues that might be holding back your earnings. Remember, AdX mastery doesn’t happen overnight – focus on one area at a time, track your progress, and gradually incorporate more advanced features as you become comfortable with the platform.